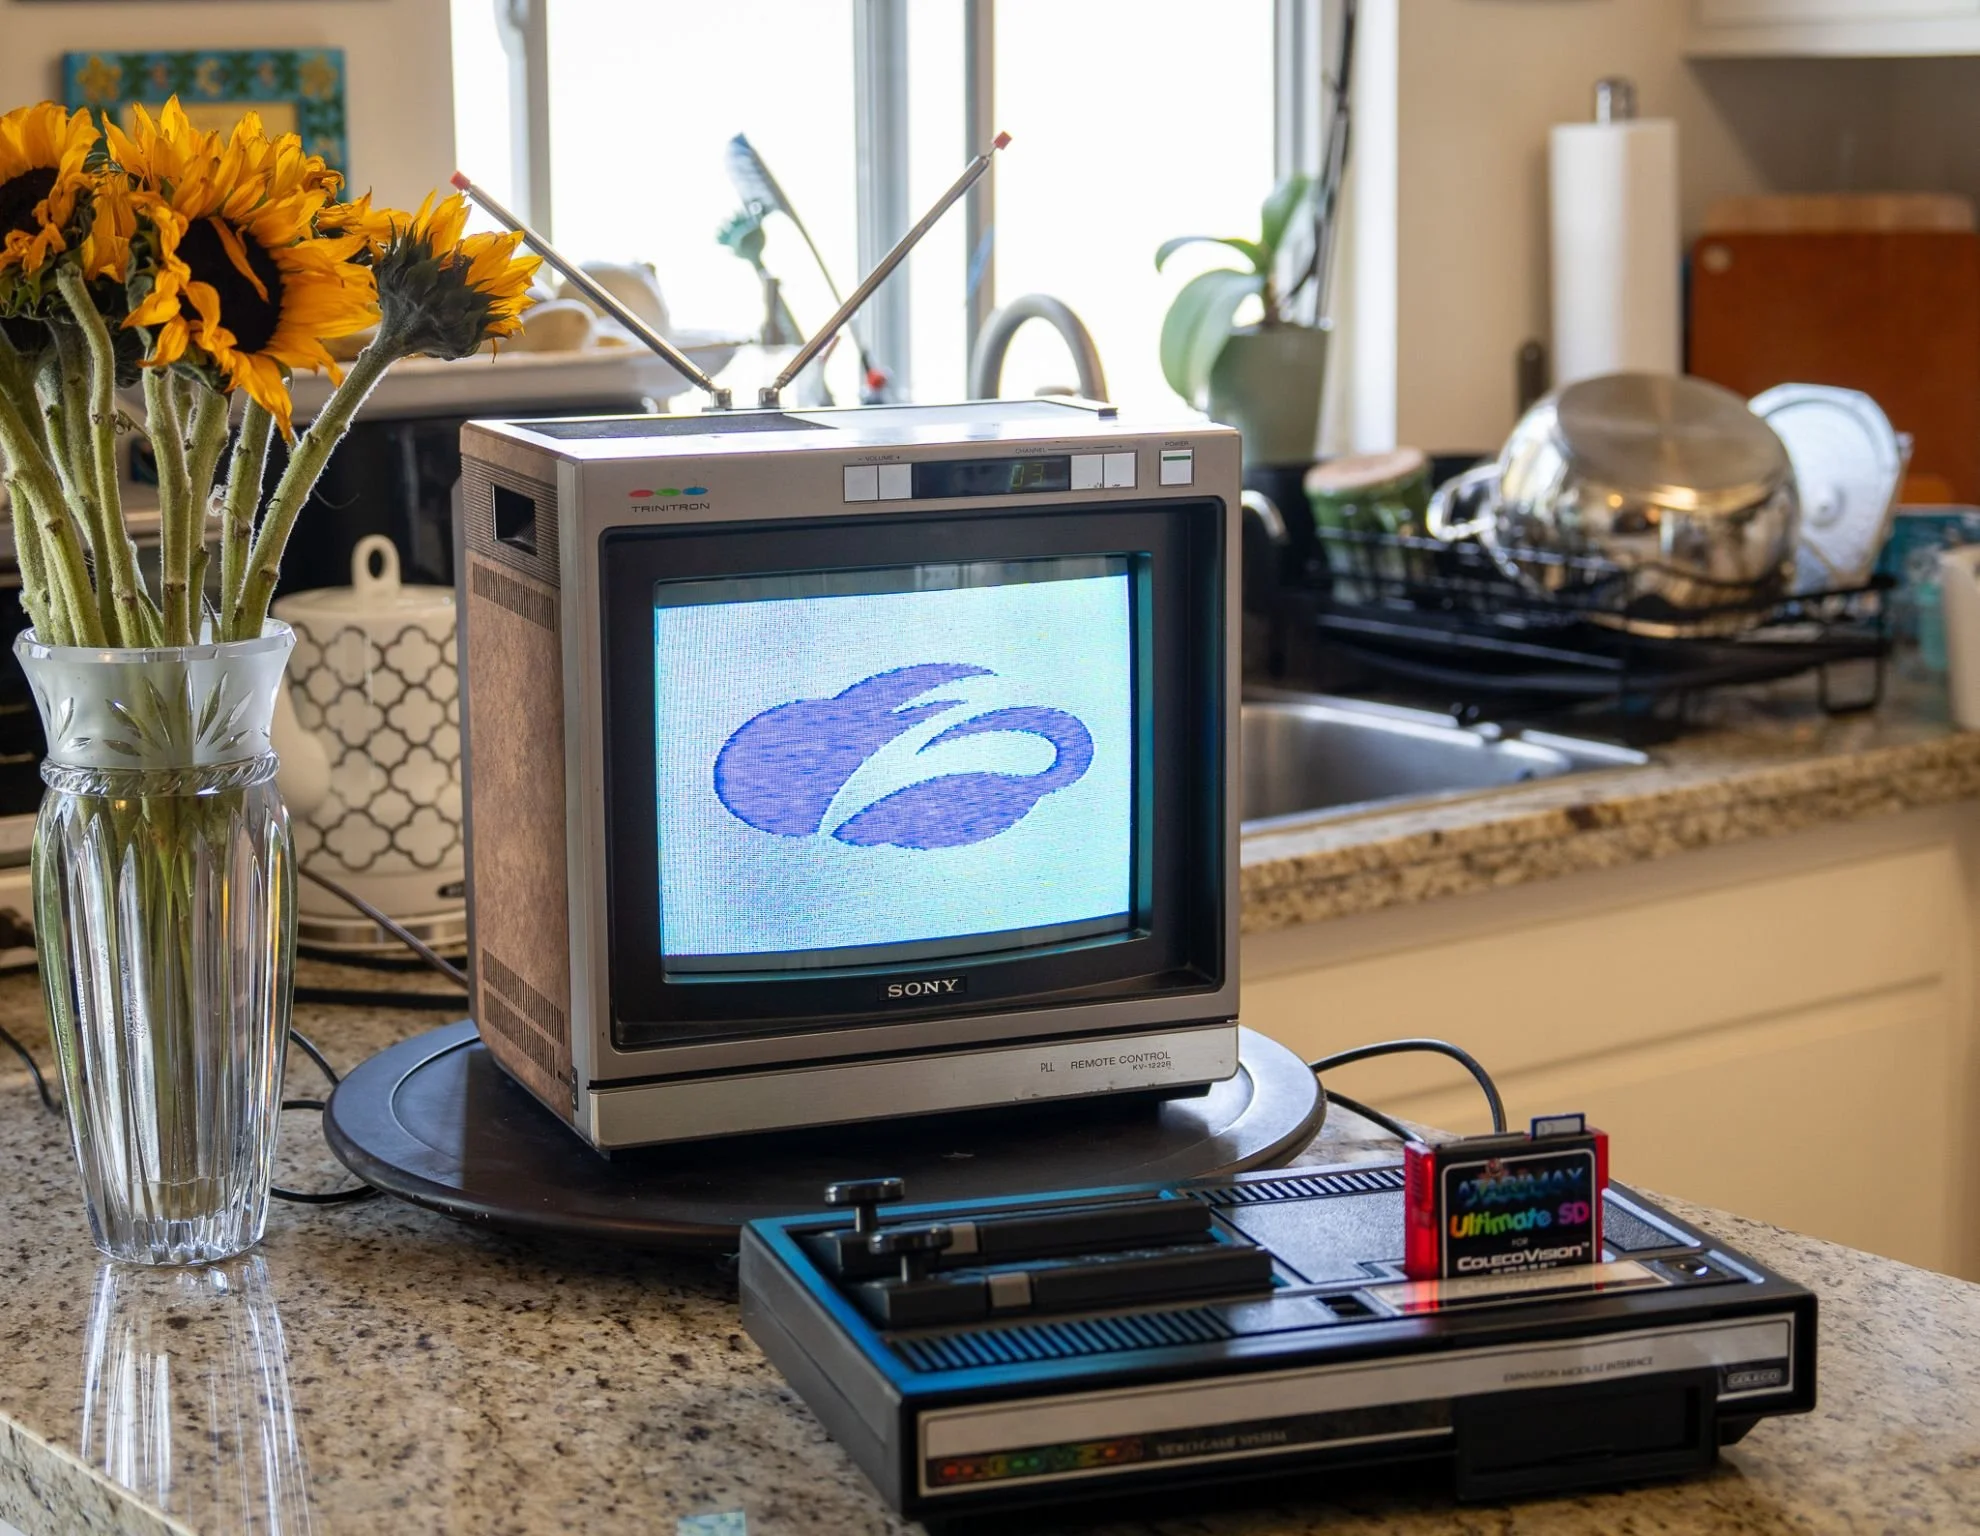
ColecoVision
For today’s “Zscaler Logo on a Weird, Old, or Obsolete Device,” we’re going back to 1982, when the most powerful home video game console was produced by a leather goods company: the mighty ColecoVision!
When the Connecticut Leather Company (“Coleco”) introduced the ColecoVision in 1982, it was the most powerful home gaming console around. In the era when market-leader Atari could only offer rudimentary versions of familiar arcade games, the ColecoVision was capable of faithfully replicating sophisticated arcade games with detailed graphics and complex sound. For example, the ColecoVision version of “Donkey Kong” feels lightyears beyond Atari’s drastically-simplified version, and the same is true with dozens of other great ColecoVision games.
Coleco’s next move was ambitious: a full-fledged desktop computer called the Adam, which could play ColecoVision games. Unfortunately, the Adam was rushed to market before it actually worked right, and the negative publicity and poor sales resulted in losses totaling $258,000,000. Unsurprisingly, Coleco soon collapsed into bankruptcy.
Today, the ColecoVision is largely forgotten, lost in the shadow of the inferior but better-selling Atari. However, I’m honestly really impressed by this machine - it’s a massive technological leap over its competitors, and its library of games contains a ton of real gems.
Of course, given the limitations of an early 8-bit gaming console from the early 1980’s, getting the Zscaler logo to display on a ColecoVision was a tricky process:
The first step was when I obtained an “UltimateSD” cartridge, which allows the ColecoVision to load games from an SD card. I noticed in the feature list for the UltimateSD that it *also* allows the user to load screenshots, which I thought might come in handy…
I then tracked down an obscure, decades-old app called “CVpaint,” which allows programmers to convert a plain bitmap image into the unique format required by the ColecoVision.
I shrank the Zscaler logo to 256x192 resolution (the highest resolution supported by the ColecoVision)
I then converted the logo to a raw bitmap
Next, I converted the raw bitmap file to the proper color depth (8 bits per color channel). Amusingly, none of my powerful modern graphics apps could produce this version of the file in a format that CVpaint could use - I had to revert back to an ancient copy of Microsoft Paint!
Finally, I used CVpaint to convert the bitmap into a raw binary file in the correct format for the ColecoVision’s video hardware
All that was left to do was drop the file into the “Screenshots” folder on the UltimateSD card, and it worked beautifully!
That’s all for today - I’ll be back with another fun project soon. Happy Friday!